Jump To Section
How do templates work?
These templates are provided to aid the creation of artwork for every size of custom cards we do. Before you start, we recommend you follow these three steps:
- Request a quote : This will help us to make sure you are getting the right size of card, correct cards per pack and the best card material for your order.
- Read our guide : We recommend reading our guide on How To Use Templates. This will familiarise you with our artwork process and template guidelines, it is not long we promise!
- Use Our Template Calculator : Lastly, enter the information provided in your quotation email into our template calculator and it will generate custom card, book and box templates perfect for your order.
All of our templates are available in 6 different formats:
- AI : Adobe Illustrator.
- IDML : Adobe Indesign.
- PSD : Adobe Photoshop.
- CANVA : A .psd that can be imported into Canva.
- PDF : Standard file format that can be opened in most graphic editors.
- SVG : Inkscape or various vector software.
Guide: Why you need to use the UKCA mark
The UKCA marking is a declaration that your pack has been tested to comply with safety legislation for toys in the UK (England, Scotland, or Wales).
Does my pack need the UKCA mark?
Playing cards fall under the UK's Toys Safety Regulations. Which means that the UKCA mark is a legal requirement for you to sell your pack in the UK.
Oracle, tarot, and other divination cards also require the UKCA mark even if they are not specifically designed for use by children. Since the base product of these are personalised cards, this also falls under the UKCA umbrella. We highly recommend adding the UKCA mark on your oracle or tarot deck.
Why is this important?
Without the UKCA marking, a vendor may refuse to sell your pack until tested at your expense. The penalty for not using the UKCA mark can also include a fine or imprisonment in extreme cases.
Do I need to do any testing?
No, we submit all of our products for testing annually with an accredited laboratory to ensure your product can be classified as toy safe and are eligible for the UKCA mark.
Where should I put the UKCA mark?
On your pack's packaging, but if there is not enough room you can also place this on a extra card or leaflet/book inside the pack. You will also need to include an address alongside the UKCA mark, this can either be the distributor's (yours) or the manufacturer's (ours).
What about the CE mark?
The UKCA marking is not recognised in the EU, so cards that are sold in the EU will need a CE marking.
Our testing passes the CE requirements and has all the documentation you need. But, since we are based in the UK, you will need to source your own EU Authorised Representative. So that you have an EU address for documentation purposes and can use the CE mark to legally distribute your pack within Europe.
If you are based in the EU, then you will not need to source a EU Authorised Representative and can instead use your own address.
Guide: Why you need to use the CE mark and be GPSR compliant
The UKCA marking is not recognised in the EU, so cards that are sold in the EU will need a CE marking and be GPSR compliant. We ensure all our products comply with GPSR, CE marking, and other applicable EU Directives, so that you don't have to. Our EU Responsible Person for GPSR product safety compliance is EU Compliance Partner.
Does my pack need to be CE and GPSR compliant?
Yes, if you are selling your product in the EU then it must be CE and GPSR compliant as of December 2024. This is a legal requirement for selling in the EU, not ensuring you have the correct markings and documents means that marketplaces can decline to sell your product.
Do I need to do any testing?
No, we submit all of our products for testing annually with an accredited laboratory to ensure your product can be classified as toy safe and are eligible for the UKCA, CE marks and GPSR.
GPSR & CE Labelling Guide
Label your products with the manufacturer’s contact details (usually your own) and the Responsible Person information from the certificate. Include a postal address and an electronic contact (email or website). If space is limited, the Responsible Person details can be on the product, packaging, parcel, or an accompanying document.
-
Guide: How To Use Templates
We've compiled everything you need to know when transferring your artwork onto our templates into one handy guide! Use the button below to download a .PDF version or keep scrolling!
-
Step one
Download the correct template from our website:
-
Step two
Part A
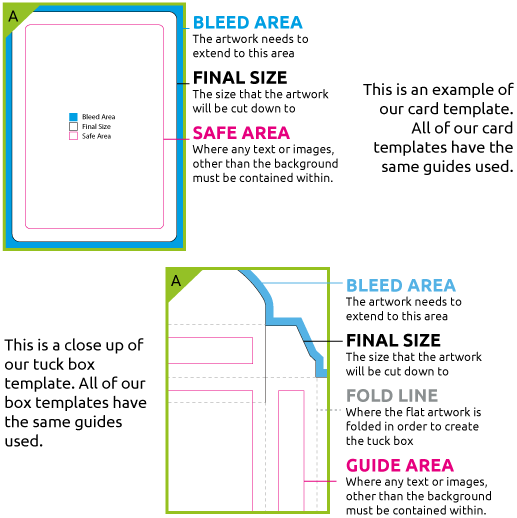
It’s important to know what the lines and colours mean on our template before adding your artwork.
-
Step three (cards)
Part A
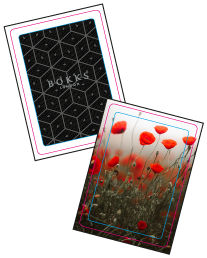
Identify which type of design you will be using:
Bordered design
Bordered designs have coloured borders: traditionally white. Borders must be no smaller than 5mm. (see part B)
Full bleed design
A full bleed design allows you freedom to run any colours or image off the edge of the cards. (see part C)
-
Part B
All content such as text and images must be confined within the designated safe area.
Part C
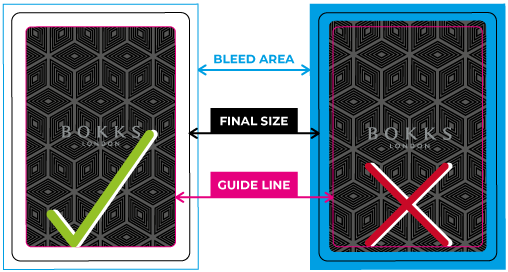
All backgrounds, borders and anything that exceeds the blue line must continue to the edge of the bleed area.
Part D
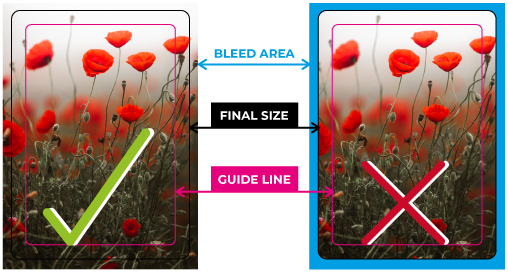
All images and effects and are a minimum of 300 ppi.
Part E
All content is created in the CMYK colour space (colour mode).
Part F
If the artwork is for playing cards, check to ensure you have created a complete set and supplied the artwork in the desired order.
Part G
Ensure all content is centrally aligned.
-
Step three (boxes)

Part A
Identify which type of design you will be using:
Bordered design
Bordered designs can have afull bleed background, but the text and illustrations stay inside the safe areas. (see part B)
Full bleed design
A full bleed design allows you freedom to place artwork outside of the safe areas. (see part C)
Part B
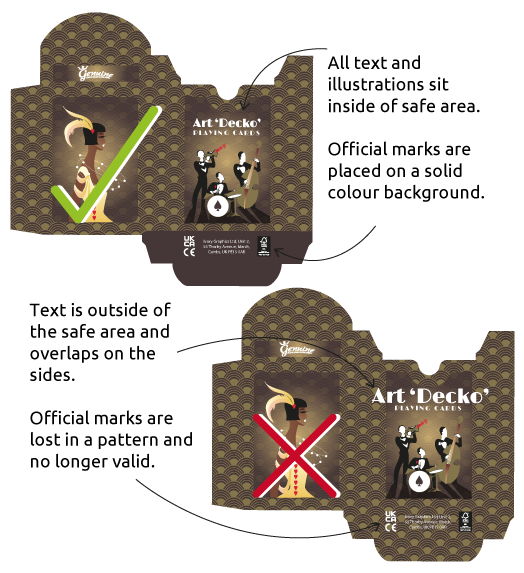
All content such as text and images must be confined within the designated safe area.
Part C
All backgrounds, borders and anything that exceeds the blue line must continue to the edge of the bleed area.

Part D
All images and effects and are a minimum of 300 ppi.
Part E
All content is created in the CMYK colour space (colour mode).
Part F
If the artwork is for playing cards, check to ensure you have created a complete set and supplied the artwork in the desired order.
Part G
Ensure all content is centrally aligned.
-
Important
Turn off/remove all template and explanation layers before supplying artwork to us.
-
Step four
Once you are ready to submit your artwork submit it via the website in .pdf format, enclosed in one .zip so you don't have to upload multiple files. It is up to you how you organise and structure your files, we recommend one of the following methods:
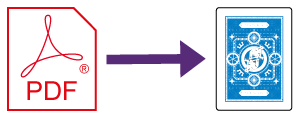
- If your deck uses a common back have a seperate file for the back (0-back.pdf for example) and then individual .PDFs for each card face - numbered accordingly (1-front.pdf, 2-front.pdf, 3-front.pdf)
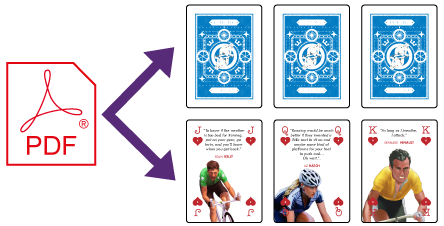
- Multipage .pdf using the format of face > back > face > back
- One multipage .pdf file for the faces, a seperate one for the backs.
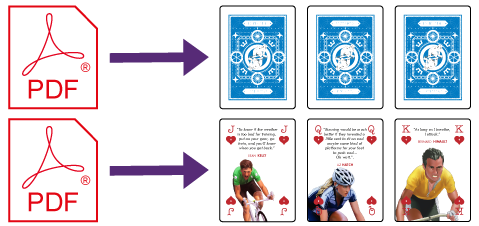
Please ensure that all cards are in the correct order and one page of a .pdf is one card. Once you have uploaded your files the next step is to await final print proofs.


